Painting Flowers on Rocks | A Fun and Easy Guide

Imagine taking a simple rock and turning it into a colorful masterpiece. That’s the magic of painting flowers on rocks. Whether you stumbled upon a smooth pebble during a hike or picked up some stones from your garden, these natural canvases are perfect for creative expression.
This delightful craft not only allows you to blend art with nature but also offers a relaxing way to spend your time. Whether you’re a seasoned artist or just starting out, painting flowers on rocks is an enjoyable and budget-friendly hobby that anyone can dive into. Let’s explore this unique art form and learn how to create stunning pieces step-by-step.
Why Painting Flowers on Rocks is a Unique Art Form?
Painting flowers on rocks is a fantastic way to combine creativity with the natural world. This art form offers endless possibilities for artistic expression and turns simple stones into stunning pieces of art.

Whether you’re a beginner looking for a new hobby or an experienced artist seeking a fresh canvas, painting flowers on rocks presents a unique and rewarding experience.
Combining Nature and Art
Painting flowers on rocks beautifully merges natural materials with creative expression. This combination allows artists to connect with nature while showcasing their artistic talents.
Here are some key points to consider:
- Natural Canvas: Rocks provide a unique surface that varies in texture and shape, enhancing the artistic experience.
- Organic Inspiration: The natural beauty of flowers can inspire designs, leading to more authentic and vibrant artwork.
- Outdoor Display: Finished pieces can be used as garden decorations or gifts, bringing art into everyday life.
Perfect for Beginners and Experienced Artists
Painting flowers on rocks is ideal for artists of all skill levels. It offers versatility and ease of experimentation, making it accessible and enjoyable for everyone.
Here are some reasons why:
- Simple Techniques: Beginners can start with basic flower designs and gradually explore more complex patterns.
- Experimentation: The forgiving nature of rock painting allows for trial and error, encouraging creativity without pressure.
- Variety of Styles: Artists can experiment with different painting techniques, colors, and flower types, making each piece unique.
- Low Risk: Mistakes can easily be painted over, making it a stress-free activity.
By highlighting these points, it’s clear that painting flowers on rocks is both a relaxing and stimulating endeavor for artists at any level.
Eco-Friendly and Budget-Friendly Craft
Painting on rocks is not only a creative outlet but also an environmentally sustainable and cost-effective craft.
Here’s why it’s a great choice:
- Sustainable Materials: Rocks are natural and readily available, reducing the need for manufactured materials.
- Cost-Effective: Most supplies needed, such as rocks and paints, are inexpensive or can be found at home.
- Recycling Nature: This craft promotes the use of found objects, encouraging a sustainable approach to art.
These aspects make painting flowers on rocks a perfect hobby for those looking to create art in an eco-friendly and budget-conscious way.
Also Read: Discover The Wing Lady’s Sliders | A Flavor Explosion
Step-by-Step Guide to Painting Flowers on Rocks
Creating beautiful flower art on rocks is an enjoyable and rewarding activity. Let’s dive into the detailed process to ensure your creations stand out.

- Gather Your Materials:
- Smooth rocks (various sizes)
- Acrylic paints (various colors)
- Paintbrushes (different sizes)
- Water container
- Paper towels or rags
- Sealer (optional)
- Prepare Your Workspace:
- Choose a well-lit area with enough space to work comfortably.
- Lay down a newspaper or a plastic sheet to protect your surface.
- Clean the Rocks:
- Rinse the rocks under water to remove dirt and debris.
- Dry them thoroughly with a towel.
- Sketch Your Design:
- Use a pencil or chalk to lightly sketch your flower design on the rock.
- Consider simple shapes like daisies or tulips for beginners.
- Start Painting:
- Begin with the base color for your flowers using larger brushes.
- Allow each layer to dry before adding more details.
- Add Details:
- Use smaller brushes for intricate details like petals and leaves.
- Experiment with blending colors for depth.
- Finishing Touches:
- Once dry, add outlines or highlights to enhance your design.
- Optionally, apply a clear sealer to protect your artwork from the elements.
- Display Your Art:
- Place your painted rocks in your garden, or home, or give them as gifts!
Creative Ideas for Painting Flowers on Rocks
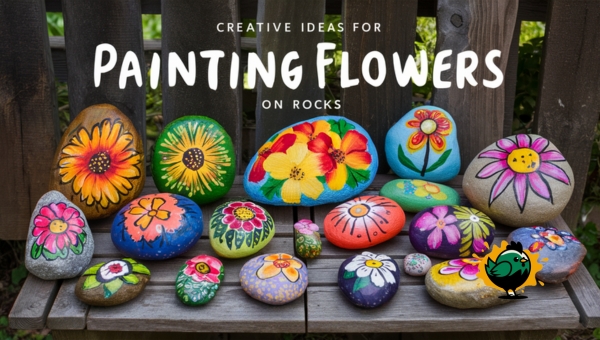
Painting flowers on rocks opens up a world of creative possibilities. Whether you are a beginner or an experienced artist, there are countless ways to transform ordinary stones into captivating pieces of art.

Here are some detailed and diverse ideas to inspire your next project:
- Colorful Garden Markers:
- Paint flower names alongside their images to label plants in your garden.
- Seasonal Themes:
- Create designs based on seasons—sunflowers for summer, snowflakes for winter.
- Inspirational Quotes:
- Combine flower paintings with uplifting quotes for decorative stones.
- Mixed Media Designs:
- Incorporate other materials like glitter or beads along with paint for added texture.
- Themed Sets:
- Create sets of rocks featuring different flowers that complement each other.
- Interactive Art:
- Paint kindness rocks with messages that encourage others when found in public spaces.
Also Read: Cowboy Beans Recipes – Easy and Delicious Classics
Common Mistakes to Avoid When Painting Flowers on Rocks
When painting flowers on rocks, it’s essential to steer clear of some common pitfalls to ensure your artwork stands out.
Here are key mistakes to avoid:
- Skipping Preparation:
- Not cleaning the rocks can lead to uneven paint application; always clean before starting.
- Using Low-Quality Paints:
- Cheap paints may fade or chip easily; invest in quality acrylic paints for durability.
- Overloading Brushes with Paint:
- Too much paint can cause drips; use minimal amounts and build layers gradually.
- Neglecting Drying Time:
- Rushing through layers without allowing them to dry can muddy colors; be patient!
- Ignoring Sealing Options:
- Not sealing your finished pieces may lead to damage from weather exposure; consider using a clear coat.
- Being Too Ambitious Initially:
- Beginners should start with simple designs instead of complex patterns; practice makes perfect!
By being mindful of these points, you can create beautiful and lasting pieces.
FAQs
How long does it take for paint to dry on rocks?
Typically, it takes about 1 to 2 hours for acrylic paint to dry on rocks. However, drying times can vary based on the thickness of the paint and environmental conditions.
Can I use acrylic paint to paint flowers on rocks?
Yes, acrylic paint is ideal for painting flowers on rocks. It adheres well to the rock surface, offers vibrant colors, and is water-resistant once dry.
Do I need to prime the rocks before painting?
Priming rocks is not necessary but is recommended. Using a primer can help the paint adhere better and make your designs more vibrant and long-lasting.
Conclusion
Painting flowers on rocks is a captivating and accessible art form that blends natural elements with creative expression. This craft is perfect for artists of all levels, offering a sustainable and cost-effective way to create beautiful pieces. By following a step-by-step guide and exploring creative ideas, you can transform ordinary rocks into stunning art.
Avoiding common mistakes ensures a smooth and enjoyable painting experience. If you found this guide helpful, be sure to explore more of our blogs for additional creative projects and tips! Your next artistic adventure awaits.
