Homemade Jam | Your Best Guide to Fresh, Flavorful Spreads

Making homemade jam isn’t just a rewarding culinary endeavor; it’s a journey into the heart of fresh, flavorful spreads customized to your taste. In this article, we will delve into the benefits of making your own jam at home, explore the essential ingredients and equipment needed, provide a step-by-step guide, and highlight common mistakes to avoid.
Finally, we’ll share some creative homemade jam recipes to inspire your kitchen creations. Ready to unlock the secrets of homemade jam? Let’s dive in!
A Symposium on Homemade Jam
If you’ve ever thought about making your own jam but felt unsure where to start, you’re in the right place. Homemade jam offers a delightful way to capture the essence of fresh fruits.

We’ll explore the various benefits and guide you through the essential ingredients and equipment you need. Ready to dive into the world of homemade jam? Let’s get started!
Benefits of Making Jam at Home
Making jam at home brings numerous advantages that store-bought options can’t match. Here are some key benefits:
- Freshness: Homemade jam uses ripe, fresh fruits, which enhances the flavor significantly.
- Control over Ingredients: You can avoid preservatives and adjust sugar levels according to your taste.
- Customization: You have the freedom to create unique flavors by combining different fruits or adding spices.
By focusing on these benefits, homemade jam becomes a rewarding and enjoyable activity.
Ingredients and Equipment for Homemade Jam
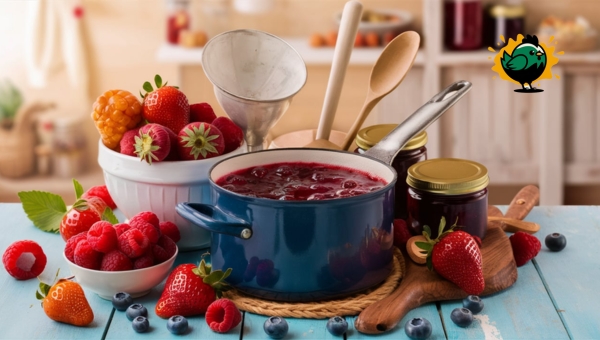
Making homemade jam is a delightful and rewarding process that allows you to control the ingredients and create flavors tailored to your taste. To get started, you need specific ingredients and equipment to ensure your jam turns out perfectly.

Essential Ingredients
- Fresh fruit (e.g., strawberries, blueberries, raspberries, or peaches)
- Granulated sugar
- Lemon juice (freshly squeezed or bottled)
- Pectin (optional, depending on the fruit and desired consistency)
Equipment
- Large pot
- Wooden spoon or spatula
- Canning jars with lids
- Ladle
- Canning funnel (optional)
- Jar lifter (optional)
Also Read: Buffalo Chicken Dip Recipe | Easy and Delicious
Step-by-Step Guide to Making Homemade Jam
Creating homemade jam is a rewarding process that allows you to enjoy fresh, seasonal flavors. Here’s a straightforward guide to help you get started:

- Prepare the Fruit:
- Wash, peel, and chop the fruit into small, even pieces.
- Measure the amount needed for your recipe.
- Combine Ingredients:
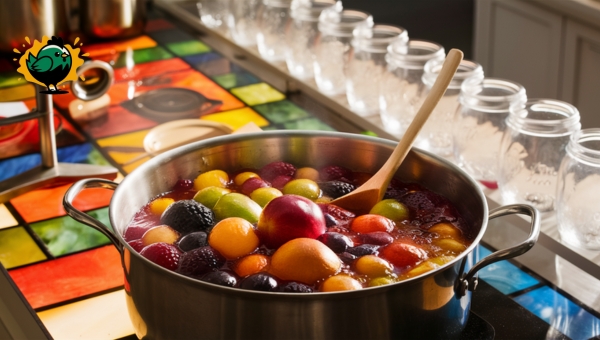
- Mix the prepared fruit with sugar, pectin, and lemon juice in a large pot.
- Stir well to ensure all ingredients are evenly distributed.
- Cook the Mixture:
- Heat the mixture over medium heat until it begins to boil.
- Stir frequently to prevent sticking and burning.
- Continue cooking until the mixture reaches a rolling boil.
- Check Consistency:
- Use a thermometer to check the temperature; it should reach 104°C (219°F).
- Alternatively, you can test the consistency by placing a small spoonful on a cold plate; it should gel and not run.
- Jar the Jam:
- Pour the hot jam into sterilized jars, leaving some space at the top.
- Seal the jars tightly and allow them to cool completely before storing.
By following these steps, you can make delicious homemade jam that preserves the essence of your favorite fruits. Enjoy your creation on toast, in desserts, or as a sweet addition to various dishes!
Common Mistakes to Avoid
When making homemade jam, it’s essential to avoid some common pitfalls to ensure a successful and delicious result.
Here are a few key mistakes to watch out for:
- Overcooking or Undercooking: It’s crucial to find the right cooking time. Overcooking can lead to a thick, hard jam while undercooking results in a runny texture. To achieve the perfect consistency, monitor the jam closely and use a thermometer to check that it reaches the correct temperature.
- Not Using Pectin Correctly: Pectin is vital for the jam to set properly. Failing to follow the instructions for pectin can result in a jam that is too liquid or too solid. Make sure to measure accurately and add it at the right stage of the cooking process.
- Improper Canning: Properly sterilizing jars and sealing them correctly is essential to prevent spoilage. Unsterilized jars or loose seals can lead to contamination and spoil the jam. Always ensure jars are clean and properly sealed before storage.
- Ignoring Fruit Quality: Using overripe or underripe fruit can affect both the taste and texture of your jam. Select fresh, ripe fruit for the best results. Additionally, wash and prepare the fruit thoroughly to remove any impurities.
By keeping these points in mind, you can avoid common mistakes and make top-notch homemade jams.
Also Read: Leftover Waffles – Creative Ways to Enjoy Every Bite
Innovative Recipes for Homemade Jams
Creating homemade jam opens up a world of flavors beyond the store-bought jars. Experimenting with different fruits and combinations can lead to delicious surprises. Let’s explore some delightful recipes to try at home.
1. Classic Strawberry Jam
Making a classic strawberry jam is a rewarding experience that captures the essence of ripe strawberries.
Here’s a detailed recipe to get you started:
- Ingredients:
- 2 cups of fresh strawberries, hulled and chopped
- 1 cup of granulated sugar
- 1 tablespoon of lemon juice
- Preparation:
- Wash and hull the strawberries, then chop them into small pieces.
- Place a small plate in the freezer (this will be used later to check the jam’s consistency).
- Cooking:
- In a large pot, combine the strawberries, sugar, and lemon juice.
- Stir the mixture over medium heat until the sugar dissolves.
- Bring the mixture to a rolling boil, stirring frequently to prevent sticking.
- Continue boiling until the mixture thickens (about 20 minutes), stirring occasionally.
- Checking for Doneness:
- To test if the jam is ready, place a small amount on the chilled plate and let it sit for a minute.
- Push the jam with your finger; if it wrinkles and holds its shape, it’s ready. If not, continue boiling and test again after a few minutes.
- Canning:
- Pour the hot jam into sterilized jars, leaving a small gap at the top.
- Seal the jars tightly and let them cool completely before storing.
2. Mixed Berry Jam
Mixed berry jam combines the flavors of various berries, offering a unique and tasty spread. Here’s how to make it:
- Ingredients:
- 1 cup of strawberries, hulled and chopped
- 1 cup of blueberries
- 1 cup of raspberries
- 1 ½ cups of granulated sugar
- 2 tablespoons of lemon juice
- Preparation:
- Wash all the berries thoroughly.
- Hull and chop the strawberries.
- Cooking:
- In a large pot, combine all the berries, sugar, and lemon juice.
- Stir the mixture over medium heat until the sugar dissolves.
- Bring to a rolling boil, stirring frequently.
- Continue boiling until the mixture thickens (about 20-25 minutes).
- Checking for Doneness:
- Use the same plate method as with the strawberry jam to check for the right consistency.
- Canning:
- Pour the hot jam into sterilized jars and seal tightly.
- Allow the jars to cool completely before storing.
3. Peach and Ginger Jam
For a bold and spicy twist, peach and ginger jam is an exciting option. Here’s a detailed recipe to try:
- Ingredients:
- 4 cups of fresh peaches, peeled and diced
- 1 cup of granulated sugar
- 1 tablespoon of freshly grated ginger
- 2 tablespoons of lemon juice
- Preparation:
- Peel and dice the peaches.
- Grate fresh ginger.
- Cooking:
- In a large pot, combine the peaches, sugar, ginger, and lemon juice.
- Stir over medium heat until the sugar dissolves.
- Bring the mixture to a rolling boil, stirring frequently.
- Continue boiling until the mixture thickens (about 25-30 minutes), stirring occasionally.
- Checking for Doneness:
- Use the chilled plate method to test the jam’s consistency.
- Canning:
- Pour the hot jam into sterilized jars, leaving a small gap at the top.
- Seal the jars tightly and let them cool completely before storing.
FAQs
How long does homemade jam last?
Homemade jam typically lasts for about one year if stored in a cool, dark place. Once opened, it should be refrigerated and consumed within a month.
Can I make jam without sugar?
Yes, you can make jam without sugar. There are sugar substitutes available, or you can use natural sweeteners like honey or fruit juice.
What’s the difference between jam and jelly?
Jam is made from crushed fruit and sugar, resulting in a thick, spreadable mixture. Jelly, on the other hand, is made from fruit juice and sugar, producing a clearer, firmer consistency.
Conclusion
Making homemade jam is a rewarding experience that combines creativity with practical benefits. It allows you to control the ingredients, ensuring a healthier and tastier product. From selecting fresh fruits to experimenting with unique flavors, the process is both enjoyable and satisfying.
By avoiding common mistakes and using the right equipment, you can achieve perfect results every time. Whether you’re preserving the taste of summer or creating personalized gifts, homemade jam is a delightful addition to any kitchen.
For more insightful tips and delicious recipes, be sure to explore our other blog posts! Happy jam-making!
