Best Hardboiled Eggs-A Guide to Perfect Results

When it comes to making the best hardboiled eggs, there’s more to it than just boiling water. In this guide, we’ll delve into the right cooking techniques, egg selection, and timing to ensure your eggs turn out perfectly every time.
Expect to uncover tips on choosing between fresh and older eggs, the pros and cons of different cooking methods, and the secrets to easy peeling.
Plus, we’ll share creative seasoning and serving ideas to elevate your hardboiled egg game. Whether you’re a novice or a seasoned cook, this article will equip you with everything you need to master the art of hardboiled eggs.
What Makes a Perfect Hardboiled Egg?
A perfect hardboiled egg is all about achieving the right balance between tender whites and creamy yolks. The key to this lies in the cooking techniques, the type of eggs you choose, and the timing. Understanding these factors can help you make consistent, delicious hardboiled eggs every time.

It’s crucial to pay attention to these elements to avoid common issues like rubbery whites or greenish yolks. Let’s dive into the importance of cooking techniques and how they influence the outcome of your hardboiled eggs.
Importance of Cooking Techniques
Cooking techniques play a significant role in determining the texture and flavor of hardboiled eggs. Here are a few key points to consider:
- Starting with Cold Water: Placing eggs in cold water and then bringing them to a boil can lead to a more even cooking process, reducing the risk of overcooking.
- Boiling Water Method: Adding eggs to already boiling water can make the whites set faster, but it may also increase the chances of cracking.
- Simmering vs. Boiling: Simmering eggs gently instead of boiling them vigorously helps maintain a tender texture and prevents the whites from becoming rubbery.
- Shock in Ice Bath: Placing cooked eggs in an ice bath immediately after cooking stops the cooking process and helps in easier peeling.
- Timing: Precise cooking times are essential to achieve your preferred level of doneness, whether you like your yolks soft, medium, or fully set.
By mastering these techniques, you can ensure that your hardboiled eggs come out perfect each time, with just the right texture and flavor.
Choosing the Right Eggs
When it comes to making the best hardboiled eggs, selecting the right eggs is crucial. The age and type of eggs can significantly impact both the peeling process and the overall taste and texture.

Understanding these factors will help you achieve perfect results every time. Let’s delve into the specifics of fresh vs. older eggs and organic vs. conventional eggs.
Fresh vs. Older Eggs
The age of the eggs is a key factor that impacts both peeling and texture. Here’s a detailed look:
| Fresh vs. Older Eggs | Fresh Eggs | Older Eggs |
|---|---|---|
| Age | Typically less than 1 week old | Usually at least 1-2 weeks old |
| Peeling | More difficult to peel due to tighter membrane | Easier to peel because the air cell enlarges over time |
| Yolk Appearance | Firm and stands high; vibrant color | Flatter yolk that may break more easily; color can vary based on diet |
| Texture of Egg White | Thick and cloudy, holds shape well | Runny and more liquid as it ages |
| Taste | Richer flavor, often preferred for frying and poaching | Still good but may lack some freshness in flavor; better for boiling |
Organic vs. Conventional Eggs
When it comes to choosing between organic and conventional eggs, there are several factors to consider, including taste and quality. Here’s a comprehensive breakdown:
| Organic vs. Conventional Eggs | Organic Eggs | Conventional Eggs |
|---|---|---|
| Farming Practices | Raised without synthetic pesticides or fertilizers; often pasture-raised | Often raised in factory farms with commercial feed and no outdoor access |
| Nutritional Value | Higher in omega-3 fatty acids, vitamin E, and beta carotene due to diet | Generally lower in some nutrients compared to organic eggs |
| Yolk Color and Texture | Typically deeper orange yolks; creamier texture | Medium yellow yolks; can be less rich in texture |
| Cost | Usually more expensive due to higher production costs | More affordable and widely available |
| Taste Profile | Often considered superior in flavor by many consumers | Taste can vary, but generally less flavorful than organic eggs |
These tables summarize the key differences between organic and conventional eggs, highlighting their characteristics, benefits, and potential drawbacks.
Also Read: Why Chickens Stop Laying Eggs – Key Factors Explained
Cooking Methods for Perfect Hardboiled Eggs
When it comes to making the best-hardboiled eggs, the cooking method you choose can make a huge difference. Whether you prefer the classic stovetop method, the convenience of an Instant Pot, or the unique approach of oven-baking, each technique has its own set of steps and benefits.

Stovetop Method
The stovetop method is a traditional way to achieve perfectly hard-boiled eggs. Here’s a step-by-step guide to help you get it right every time:
- Place Eggs in a Pot: Arrange your eggs in a single layer at the bottom of a saucepan.
- Add Cold Water: Fill the pot with cold water, about an inch above the eggs.
- Bring to a Boil: Heat the pot over medium-high heat until the water reaches a rolling boil.
- Remove from Heat: Once boiling, remove the pot from the heat and cover it with a lid.
- Set Timer: Let the eggs sit in the hot water. For medium eggs, set a timer for 9-12 minutes. Adjust the time based on the egg size and desired yolk firmness.
- Transfer to Ice Bath: After the timer goes off, use a slotted spoon to move the eggs to a bowl of ice water. Leave them there for about 5-10 minutes to cool.
This method is straightforward and allows for easy control over the cooking time, ensuring the eggs are cooked to your liking.
Instant Pot Method
Using an Instant Pot for hardboiled eggs is a game-changer, offering precision and consistency. Here’s how to do it:
- Place Trivet and Eggs: Insert the metal trivet into the Instant Pot and place the eggs on top.
- Add Water: Pour in one cup of water.
- Set Cooking Time: Close the lid and set the Instant Pot to high pressure for 5 minutes.
- Natural Release: Allow the pressure to release naturally for 5 minutes after cooking.
- Quick Release: Perform a quick release for any remaining pressure.
- Transfer to Ice Bath: Move the eggs to an ice bath immediately and let them cool for 5-10 minutes.
This approach is particularly useful for those who want a hands-off cooking experience with reliable results.
Oven Method
The oven method for hard boiling eggs is less common but offers some unique advantages, especially when cooking in large quantities.
Here’s how it’s done:
- Preheat Oven: Set your oven to 325°F (165°C).
- Prepare Eggs: Place the eggs directly on the oven rack or in a muffin tin to prevent them from rolling around.
- Bake: Cook the eggs for 30 minutes.
- Transfer to Ice Bath: Once done, move the eggs to a bowl of ice water for about 5-10 minutes.
Pros:
- Ideal for cooking large batches.
- Consistent results without needing to monitor boiling water.
Cons:
- Requires more time compared to other methods.
- Risk of overcooking if not carefully monitored.
Each method has its own merits, and choosing the right one depends on your preferences and needs. Whether you go for the stovetop, Instant Pot, or oven method, following these detailed steps will help you achieve the best-hardboiled eggs every time.
Also Read: Fairy Eggs | A Chicken Keeper’s Guide to the Oddities
Timing and Temperature
When aiming for the best-hardboiled eggs, timing and temperature are key factors. Both elements work together to ensure your eggs come out perfectly cooked, without any overcooked or undercooked spots. Let’s dive into the specifics to get those perfect results every time.
Ideal Cooking Times
The cooking time for hardboiled eggs varies depending on how you like your yolk. Here’s a guide to help you achieve the desired level of doneness:
- Soft-Boiled Eggs: For a runny yolk, cook the eggs for about 6 minutes. The whites will be set, but the yolk will remain soft and creamy.
- Medium-Boiled Eggs: For a slightly firmer yolk that is still a bit jammy, aim for 8-9 minutes of cooking time.
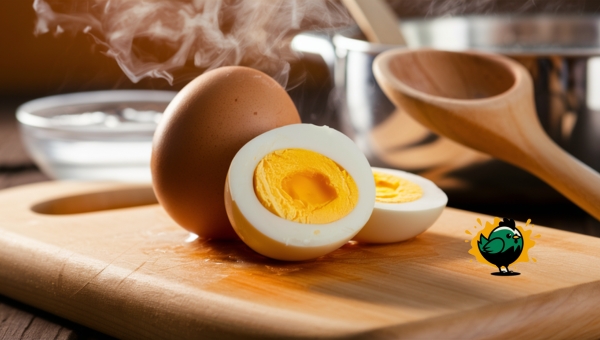
- Hard-Boiled Eggs: For a fully set yolk that is firm throughout, cook the eggs for 10-12 minutes. This will ensure the yolk is completely cooked but still moist, avoiding the green ring that indicates overcooking.
Temperature Tips
The temperature at which you start cooking your eggs plays a significant role in their final texture and ease of peeling.
There are two primary methods to consider:
- Starting in Cold Water: Place the eggs in a saucepan and cover them with cold water. Bring the water to a boil over medium heat. This gradual increase in temperature helps prevent the shells from cracking. Once the water reaches a rolling boil, reduce the heat and simmer the eggs for the desired time. After cooking, transfer the eggs to an ice bath to stop the cooking process and make peeling easier.
- Starting in Boiling Water: For a quicker method, bring a pot of water to a boil before adding the eggs. Carefully lower the eggs into the boiling water using a slotted spoon. This method can be a bit more unpredictable as the sudden temperature change may cause some eggs to crack. However, it can result in more evenly cooked eggs. After boiling for the desired time, transfer the eggs to an ice bath to cool.
By understanding and controlling these variables, you can achieve the best hardboiled eggs every time. Experiment with these techniques to find your preferred method and timing.
Conclusion
Mastering the art of making the best hardboiled eggs involves understanding the right techniques, selecting quality eggs, and perfecting cooking methods. With the tips and methods outlined here, you can achieve consistently delicious and perfectly textured hardboiled eggs.
Whether you’re a seasoned cook or a beginner, these insights will elevate your cooking game and ensure optimal results every time. For more culinary tips and recipes, be sure to explore other informative blogs on our site. Your journey to kitchen mastery starts here!
